You will need…
- Access to the Weighbridge Module (fissara MOVE Pro)
Overview
With the Weighbridge Module update, we’ve carefully designed, created and implemented new functionality to improve the way you manage your Weighbridge. With more customisation, more detailed overviews and slicker tipping creation, it’s never been easier to maintain your Weighbridge. This document serves as a guide on how to set up and customise your Weighbridge Module.
Solution
- In your MOVE environment, expand the Admin section of the navigation bar
- Click on Weighbridge Settings to navigate to the next page
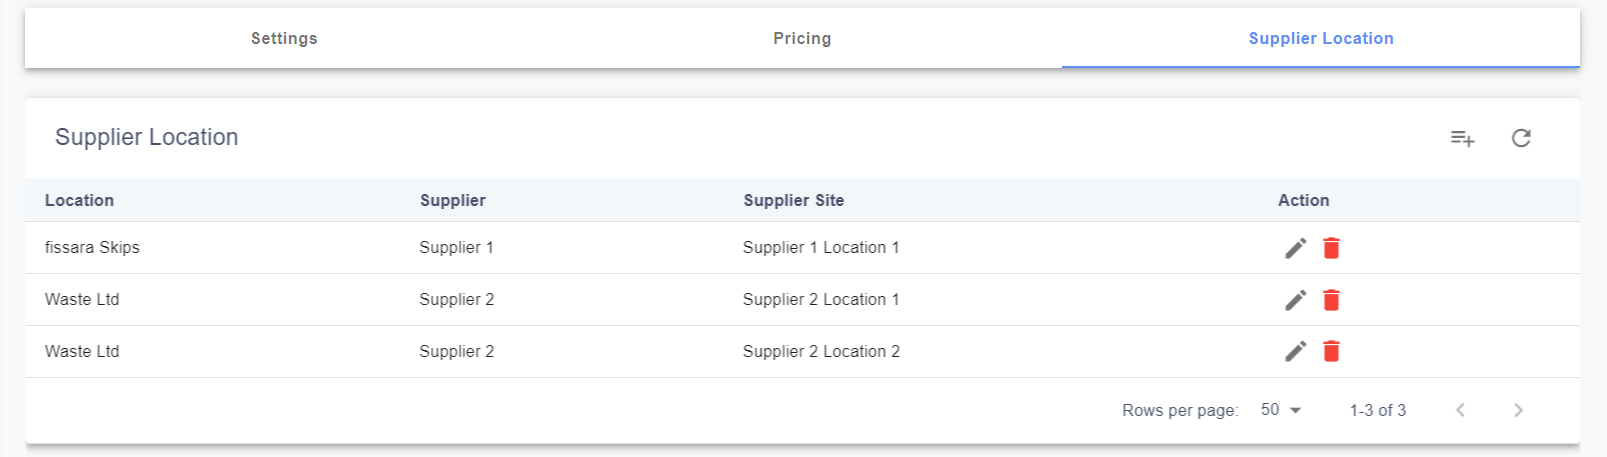
Adding Supplier Locations
Some areas of the Weighbridge module require supplier locations to be set up, therefore it’s advisable to follow this section before progressing further. This section allows you to define which supplier locations are valid weighbridge sites.
- In your Weighbridge Settings screen, click on the Supplier Locations tab at the top centre of the screen
- Click on the Add Supplier Location button, marked with a + icon
- From the Location drop-down, select a pre-existing location
- In the Supplier drop-down, select a pre-existing supplier
- Once you’ve selected a supplier, choose the location which is associated with this supplier
- Click Save
Customising Tipping Terms
Easily customise the “tipping terms” text that appears at the bottom of your digital Waste Transfer Note document by following these steps:
- In your Weighbridge Settings screen, click into the Tipping Terms text field
- Type out the text that you’d like to appear at the bottom of your digital WTN
- Click Save
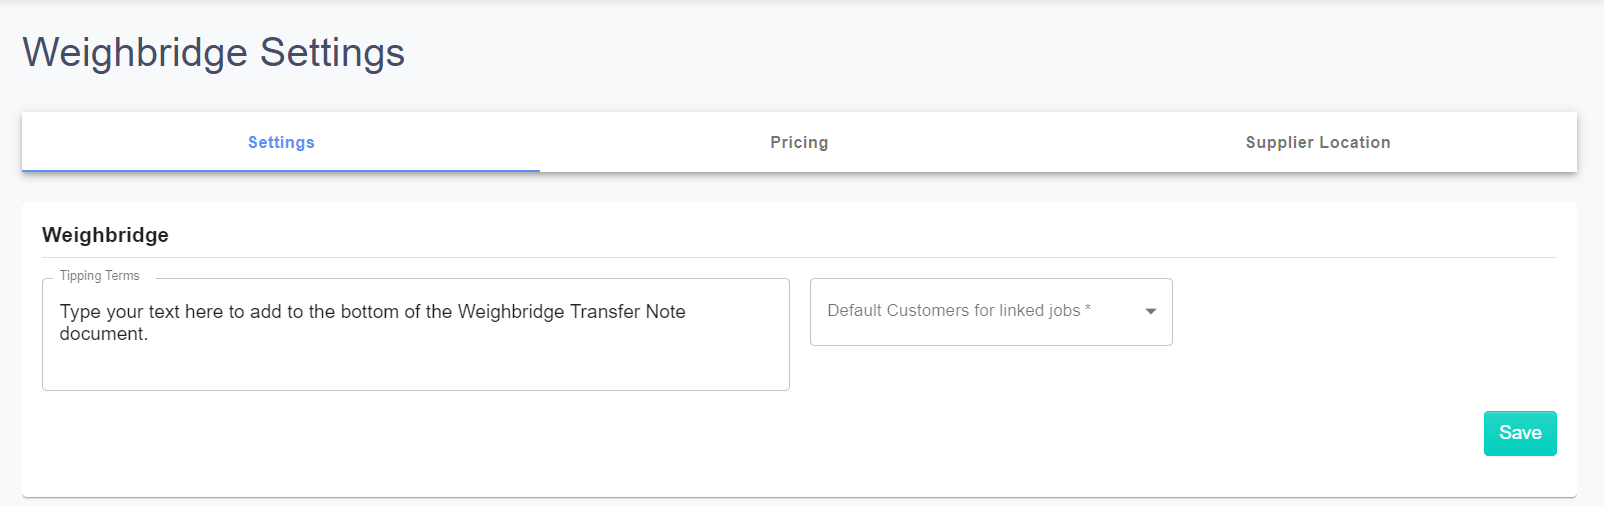
Adding Default Customers for Linked Jobs
Select how you’d like the customer details to be pre-populated when connecting weighbridge jobs to existing ones.
- Customer of Linked Job
- The customer that is selected in the existing job will be pre-populated to the weighbridge ticket
- Manual Selection
- No customer details will be auto-populated to the weighbridge ticket
- Specified Customer
- All linked weighbridge jobs are automatically linked to this customer

Adding Weighbridge Pricing
Save time by creating pricing templates which can be called upon each time you create a new tipping.
- In your Weighbridge Settings screen, click on the Pricing tab at the top centre of the screen
- Click on the Add Weighbridge Price button, marked with a + icon
- In the presented modal, select a pre-existing location
- In the Pricing Type field, select whether this will be charged by load or tonnes
- In the Weighbridge Job Type field, choose whether this is an outgoing or inbound product
- Select which product this price is associated with in the Material/Waste Type field
- You must add the minimum price which is required for this material/waste type in the Minimum Price field
- Define how much each unit of this waste/material costs in the Price per Unit field
- Click Save

Adding Tipping Zones
Make it easier to track where waste has been dumped by creating individual tipping zones which will appear on your Waste Transfer Notes when selected.
- In your Weighbridge Settings screen, find the Weighbridge Zones panel
- Click Add Tipping Zone, marked by a + icon to open the tipping zone modal
- Give your tipping zone a relevant name by typing into the Zone Name text box, remember that this will appear on customer documentation
- Select the location of the tipping zone by clicking into the Location field and selecting from the drop-down menu
- Click Save
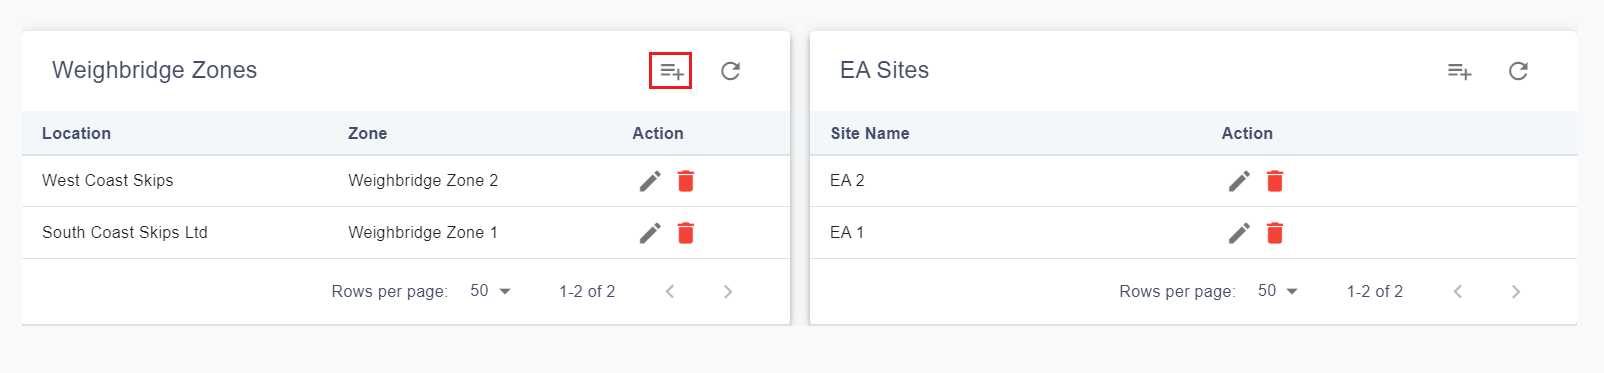
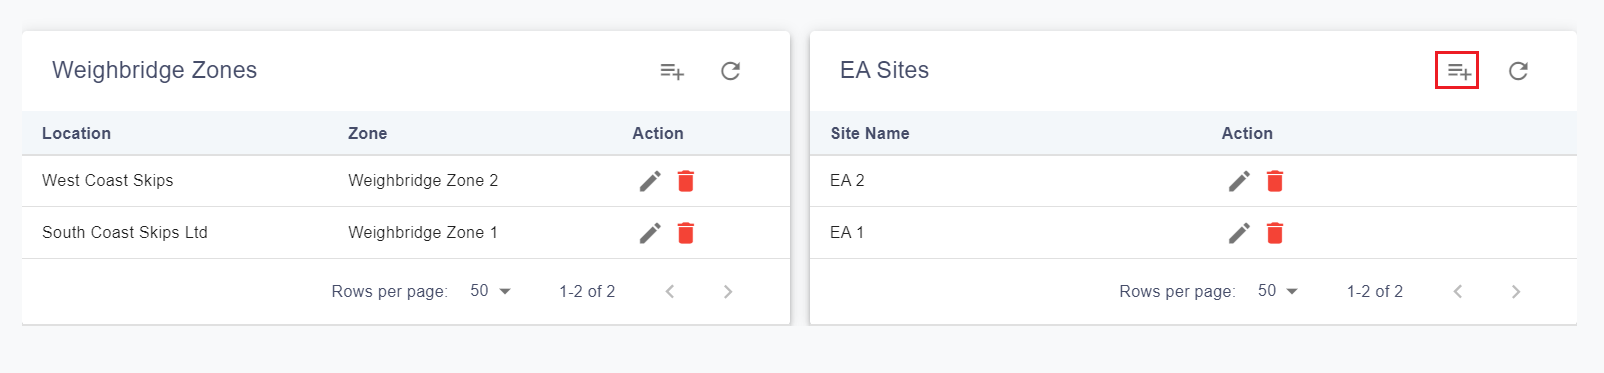
Adding EA Sites
You can also customise which EA (Environmental Agency) sites are used during weighbridge jobs.
- In your Weighbridge Settings screen, find the EA Sites panel
- Click Add EA Sites, marked by a + icon to open the EA site modal
- Give your EA site a relevant name by typing into the Site Name text box, remember that this will appear on customer documentation
- Click Save
Notes
- See Creating a New Tipping for next steps